Confirm the sand needs replacing
To change sand in a pool filter, shut off power, release pressure, drain the tank, remove the old media, inspect the internals, and refill with the manufacturer’s specified sand. Backwash and rinse before returning to filtration, and never move the multiport valve while the pump runs.
Most California pools operate year-round, so a new season alone does not justify replacing sand. Use the filter manual’s replacement guidance alongside actual performance. Sand age alone cannot distinguish dirty media from a broken internal component.
Our technicians first check whether proper backwashing restores filtration. Record pressure at the same pump speed and valve settings before and after cleaning. Comparing readings at different speeds can make clean media appear restricted.
| What you notice | What to check before replacing sand |
|---|---|
| Pressure returns to its clean baseline after backwashing | The media may only need routine cleaning. |
| Pressure stays high after proper backwashing | Check for restricted return flow, valve problems, and heavily fouled media. |
| Sand repeatedly collects beneath return jets | Inspect the laterals, standpipe, and media specification. |
| Water stays cloudy despite normal pressure | Check sanitizer, circulation, and possible bypassing inside the filter. |
Hard source water in San Diego, Los Angeles, and Orange County makes calcium buildup a relevant check. Evaporation further concentrates minerals. If the bed contains calcified clumps or cemented sections, replacing loose sand alone will not address the hardened material.
Sacramento and East Bay source water is generally much softer. Do not assume mineral buildup explains poor filtration there. Check cleaning results and equipment condition before choosing media replacement.
Get the correct media, quantity, and tools
Read the model label before buying media or opening the tank. Record the specified sand grade, total weight, and loading instructions. Many filters use No. 20 silica pool filter sand, but your model’s instructions control the choice. Play sand and general-purpose sand are unsuitable substitutes.
Divide the required weight by the weight per bag. For example, a filter requiring 250 pounds needs five 50-pound bags. This illustrates the calculation, not a recommended filter capacity. Measure any partial bag rather than emptying extra media into the tank.
Leave the specified space above the sand so the bed can expand during backwashing. Do not fill the tank to its neck. Alternative media may require a different weight, so confirm compatibility and loading instructions before switching.
- Locate the manual’s opening, loading, and startup instructions.
- Check whether the valve mounts on top or beside the tank.
- Have a wet/dry vacuum approved for wet pickup, a small scoop, containers, and a hose ready.
- Obtain any specified replacement seals before taking the filter apart.
- Follow the sand bag’s eye protection and respiratory precautions, and avoid airborne dust.
A top-mounted valve may require plumbing disconnection. If there are no accessible unions, or fittings look brittle, arrange service before starting. On coastal equipment, inspect metal clamps and fittings for salt-air corrosion before loosening them. A damaged closure must be addressed before repressurizing the tank.
Our pool filter cleaning service can help determine whether cleaning, media replacement, or equipment repair fits the problem.
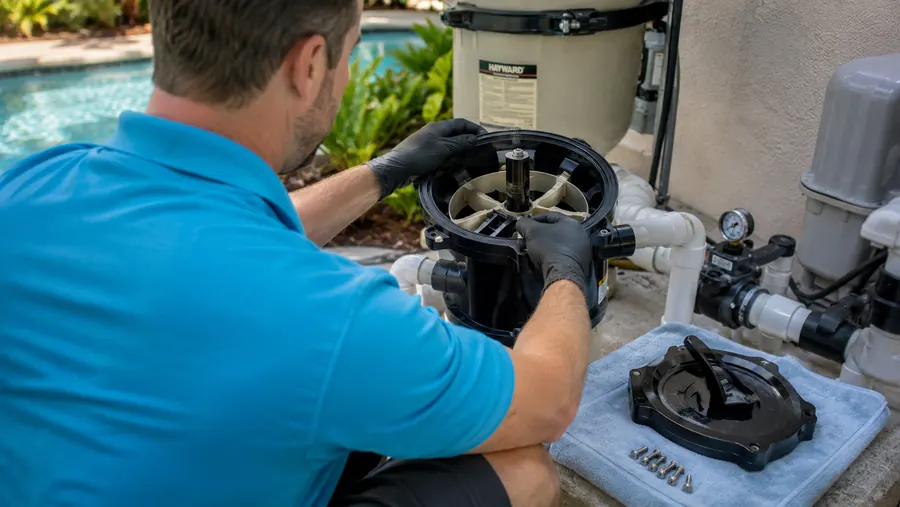
Remove the old sand and refill the filter
Choose a maintenance window when the pool can stay unused until filtration is restored and checked. In Sacramento, choose a nonfreezing window and allow time to restore circulation and freeze protection before a cold night.
- Isolate power and water flow. Shut down the heater according to its instructions, then stop the pump. Switch off its breaker and prevent scheduled or remote starts. Close isolation valves where required by the equipment layout, especially when the filter sits below pool water level.
- Release pressure completely. Follow the manufacturer’s pressure-release procedure. Confirm the gauge reads zero and pressure is relieved before loosening any clamp, valve, or lid. A zero reading alone is insufficient if the gauge is faulty.
- Drain the filter tank. Open its drain as directed and allow water to leave. This task does not require draining the pool. Keep removed sand out of drains and collect it in manageable containers.
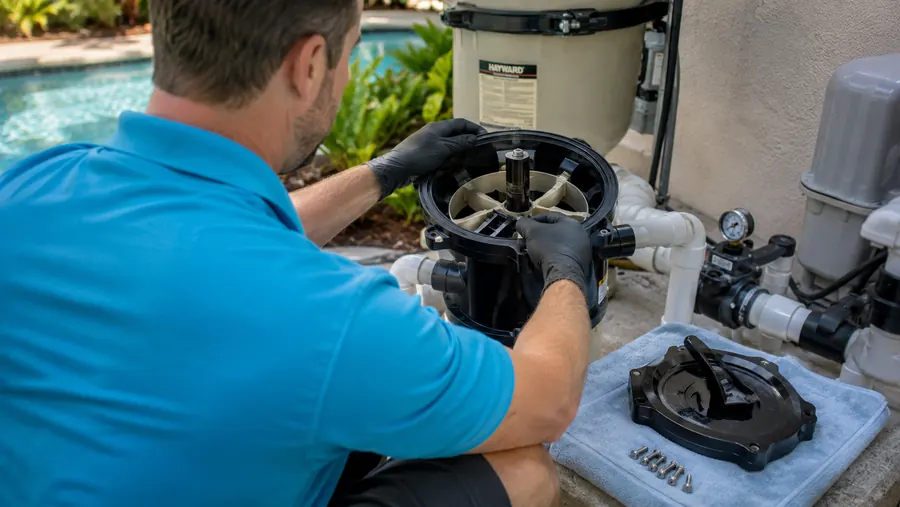
- Open the tank carefully. Photograph the plumbing and valve orientation first. Disconnect the valve or remove the access lid following the manual. Avoid pulling against the internal standpipe.
- Cover the standpipe opening. Use a secure, removable cover to keep sand out of the pipe. Media entering it can travel directly toward the pool during startup.
- Remove the old sand gradually. Scoop or vacuum manageable amounts. A wet/dry vacuum becomes heavy quickly. Work gently near the bottom, where fragile slotted laterals collect filtered water. Expose these parts before attempting to lift the internal assembly.
- Inspect the exposed internals. Check laterals and the standpipe for splits or loose connections. Follow the manual if removal is needed. Do not force folding or threaded parts, and replace damaged components before adding fresh media.
- Prepare the tank for loading. Rinse out remaining debris, reassemble the internals, and secure the drain. Add the water depth specified by the manufacturer to cushion the laterals.
- Add the measured media slowly. Keep the standpipe centered and covered. Spread sand evenly without forcing or packing it down. Follow the specified weight and loading level. If they appear inconsistent, verify the model and media before continuing.
- Reseal the filter. Remove the standpipe cover. Clear sand from sealing surfaces and inspect seals. Use only manufacturer-approved lubricant where specified, then reassemble and tighten according to the manual.
If cemented media cannot be removed without levering against the internals, stop. Do not hammer through the bed or use the standpipe as a handle. Hardened deposits can hide laterals, making forceful removal likely to damage them.
Start up and verify pressure, flow, and leaks
Fresh sand needs its initial backwash before normal filtration. With the pump off, select the required valve position and establish the discharge route. Restore the appropriate water valves, prime the pump, and follow the filter’s startup and air-release instructions. Stand clear of the tank closure while starting it.
Backwash for the manufacturer’s specified duration or endpoint. Stop the pump before selecting rinse, complete the specified rinse, then stop again before selecting filter. Keep the pool water level high enough to prevent the pump from drawing air. If the pump loses prime, stop and correct the problem.
Once flow stabilizes, record the clean pressure, pump speed, and valve settings. This becomes the reference for future cleaning decisions. Use the filter manufacturer’s pressure-rise threshold rather than a universal pressure target. Our guide to backwashing and checking the results explains routine checks.
Inspect the valve, drain, and tank closure for leaks. If a connection leaks, shut down and relieve pressure before adjusting it. Never tighten a tank clamp while the filter is pressurized.
Check beneath the returns after startup and again during the next filtration cycle. Repeated gritty sand deposits warrant investigation. Incorrect media, overfilling, or damaged internals can cause sand loss. Continued vacuuming will remove the symptom without correcting the fault.
Decide between cleaning, media replacement, and repair
Choose the next step from the filter’s response to cleaning and the condition of its parts:
- Continue routine cleaning: Backwashing restores the clean pressure baseline, circulation is normal, and no sand escapes.
- Request a media assessment: Correct backwashing fails to restore performance after flow restrictions are ruled out. The bed may need a filter-compatible deep cleaning or replacement, depending on fouling and hardened deposits.
- Arrange equipment repair: Sand keeps escaping, internal parts are damaged, a closure cannot seal safely, or the valve does not operate correctly.
Before requesting service, photograph the model label, valve, plumbing connections, and pressure gauge. Include the pump speed, when symptoms began, and whether backwashing changed them. Those details help us prepare the appropriate media, seals, or replacement parts.
Our technicians confirm the right fix after seeing the equipment. For persistent sand loss or damaged internals, request pool filter inspection and repair before loading another batch of sand.